COME FARE IL CARAMELLO (ITALIANO)
When we cook we are starting many chemical reactions. Probably the most fascinating is the caramelization, a sugar transformation reaction. Basically is the oxidation of sugar. The process of caramelization starts with the melting of the sugar at high temperatures (160 ° C) where the sugars starts to liquefy. Its molecules begin to break and the fragments react with each other forming a whole series of aromatic brown compounds. Simply speaking, caramelization is the process of removal of water from a sugar followed by isomerization and polymerisation steps. Depending on the types of sugars contained in an ingredient, the temperature at which the caramelization process begins varies.
Making caramel is a simple but sometimes dangerous process because working with melted sugar involves high temperatures! I have experience and in any case when I prepare it, I am always very careful to not burn myself! There are three methods for making caramel:
- Dry Caramel: I heat sugar in a pan until it first liquefies and then caramelizes. This method requires a little more experience because you risk to heat to much the sugar and then burn it. Sugar must not be touched with any utensil.
- Wet Caramel: For every 300 grams of sugar, I add 150 grams of water. However, the amount of water is not very important because then it’ll evaporate: it only serves to initially dissolve part of the sugar and start heating it without the risk of burning it. At 160 °C the water is completely evaporated and at 170 °C what’s left is pure, liquefied sugar, which is heated until it caramelizes. From this point, mixing is no longer a problem. The flavor of the caramel obtained is different depending on the maximum temperature at which it is cooked. This is because sucrose decomposition products are different and have different aromas and flavors. With a lower temperature I get a sweeter caramel. With a higher temperature, I get a less sweet caramel but more intense, with a more complex flavor.
- Microwave Caramel: it is the simpler and safer method. For every 100 grams of sugar, I add 20 grams of glucose or honey syrup and 10 grams of water. Glucose syrup will help to no melt prematurely the sugar and, because of the water that contains, it will absorb heat quicker. I mix all the ingredients in a small bowl and then I put in the microwave for 3-5 minutes at maximum power. Depending on the degree of caramelization, a compound of various colors can be obtained. From light blond to dark red, from brown to blackish (if it has been heated too much and has started to degrade).
Excellent with ice-creams, cakes or crepes, they are really greedy and very simple to prepare. You just have to be very careful to not get burned. That’s the ingredients:
- 100 gr of caster sugar
- 110 gr of cream
- 1 gr of salt
- 1 gr of Vanilla
Heat granulated sugar in a medium saucepan over medium heat, stirring constantly with a high heat resistant rubber spatula or wooden spoon. Be careful not to burn. Once sugar is completely melted, at 170 °C, immediately add the boiling cream. Since the heavy cream is colder than the caramel, the mixture will rapidly bubble when added. Allow the mixture to boil for 1 minute. It will rise in the pan as it boils. Remove from heat and stir in 1 gr of salt. Allow to slightly cool down before using. Caramel thickens as it cools. 🙂
Here my secrets for a perfect caramel:
- First of all, choose which caramel method you want to use: dry one, wet one or the one in microwave?
- The ideal is to use sucrose to obtain an amber caramel. Other sugar mieme have different managements.
- As the caramel cooks, it’s going to bubble up furiously, so choose a large heavy-based saucepan to cook your sauce and avoid spills.
- Once your sugar has melted immediately stop stirring or you risk the crystals forming again and ruining the mix. Instead, gently tilt the pan around to allow the sugar to caramelise, prevent burning and to get it to cook evenly.
- If you’re worried you’ll burn your caramel, or you’d prefer to take the guesswork out of getting to the right spot, try using a sugar thermometer.
- Use a medium heat. Many people are tempted to crank the heat while you’re starting the cooking process to get things moving. High heat can cause the sugar mixture to burn and there’s no turning back once you’ve gone too hot.
- The color of the caramel is how you can tell if you’ve cooked it enough. Look for a deep amber color
- The deep amber caramel is used to coat molds of cream caramel or flan, prepare crunchy bases, ice creams or puddings.
- Once you’ve burned your caramel, there’s no going back.
- Brown caramel is used in small quantities to mix with cream, desserts, and to color sauces and broths.
IL CARAMELLO
Quando cuciniamo, consapevolmente o meno, diamo vita a moltissime reazioni chimiche. Fra tutte, probabilmente, quella più affascinante è la caramellizzazione, una reazione di trasformazione degli zuccheri. Mettendo un paio di cucchiai di saccarosio in un pentolino, cominciando a scaldare, a circa 160 °C lo zucchero comincia a liquefarsi. Le sue molecole cominciano a rompersi e i frammenti reagiscono tra loro formando tutta una serie di composti bruni aromatici: lo zucchero sta caramellizzando, cioè formando, appunto, il caramello. A seconda del grado di caramellizzazione, si può ottenere un composto dal colore biondo chiaro sino a uno rosso cupo, bruno o, se scaldato troppo e ha iniziato a degradarsi, addirittura nerastro.
Che sia da usare per una salsa o perché no un croccante, fare il caramello è un procedimento semplice ma a volte pericoloso, perchè lavorare con lo zucchero fuso prevede alte temperature! Io ho esperienza e comunque quando lo preparo, sto sempre molto attenta a non ustionarmi!
Esistono tre metodi per preparare il caramello:
- Asciutto: metto lo zucchero in un pentolino spesso. Questo metodo richiede un pò di esperienza in piu’ perché si rischia di riscaldare lo zucchero in modo non uniforme e di farlo bruciare. Lo zucchero non deve essere toccato con nessun utensile. Questo metodo è utiizzato per ottenere un caramello che solidifichi da freddo.
- Bagnato: è il metodo per ottenere un caramello liquido, anche da freddo; per ogni 300 grammi di zucchero , aggiungo 150 grammi di acqua in modo che la consistenza sia simile a quella della sabbia un po’ bagnata. La quantità di acqua, comunque, non è molto importante perché poi evaporerà: serve solo per sciogliere inizialmente parte dello zucchero e iniziare a scaldarlo senza il rischio di bruciarlo. A 160 °C l’acqua è completamente evaporata e a 170 °C lo zucchero fuso comincia a caramellizzare cambiando colore. Da questo punto mescolare non è più un problema. Il sapore del caramello ottenuto è diverso a seconda della temperatura massima a cui è stato portato lo zucchero. Questo perché i prodotti di decomposizione del saccarosio sono diversi e hanno aromi e sapori diversi. Da una temperatura più bassa ottengo un caramello più dolce; quindi da una più alta, un caramello meno dolce ma più intenso, con un sapore più complesso.
- Al microonde: metodo più semplice e sicuro . Per ogni 100 gr di zucchero, aggiungo 20 gr di sciroppo di glucosio o miele e 10 gr di acqua in un recipiente adatto alla cottura in microonde. Lo sciroppo di glucosio aiuterà a non cristallizzare prematuramente lo zucchero fuso e, con l’acqua che contiene, assorbirà più velocemente il calore nel microonde. Mescolo per amalgamare i vari ingredienti. Metto nel microonde a massima potenza per 3-5 minuti a seconda della potenza del mio apparecchio. A seconda del grado di caramellizzazione si può ottenere un composto dal colore biondo chiaro sino a uno rosso cupo, bruno o, se è stato scaldato troppo e ha iniziato a degradarsi, addirittura nerastro.
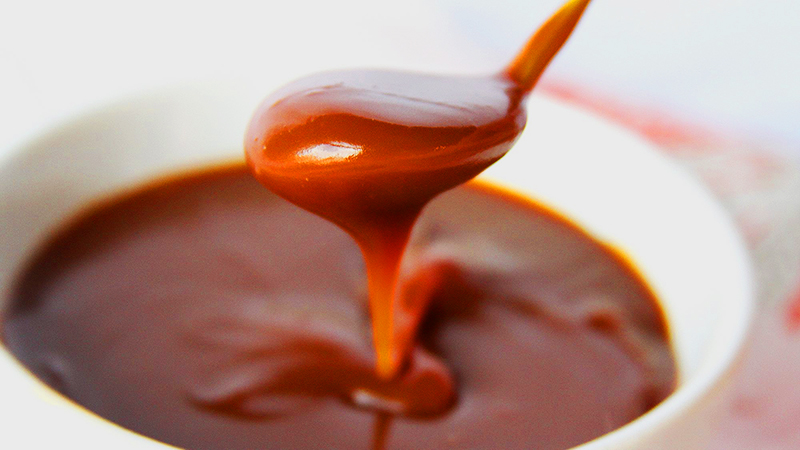
Qui la mia ricetta per un ottima salsa al caramello: ottima per accompagnare gelati , torte o crepes, e’ una preparazione davvero golosa e molto semplice da eseguire . Bisogna pero’ stare molto attenti a non scottarsi.
- 100 gr di zucchero semolato
- 110 gr di panna
- 1 gr di sale
- 1 gr di vaniglia
Per prima cosa cuocio a secco lo zucchero, sto molto attenta a non bruciarlo, aggiungendolo poco per volta in pentola fino ad ottenere un composto dorato senza cristalli. Alla temperatura di 176 gradi C, aggiungo la panna bollente poco per volta e mescolo fino ad ottenere la consistenza che mi piace. Tolgo dal fuoco e faccio raffreddare. Correttamente conservata in frigo, posso tenere la salsa fino a tre settimane . La panna può essere sostituita da qualunque altro liquido, come succo d’arancia o una polpa di frutta o semplice acqua, a patto che sia bollente, onde evitare la formazione di cristalli dovuti allo shock termico delle diverse temperature del liquido e dello zucchero.
Qui i miei suggerimenti per un caramello perfetto:
- Per prima cosa decidete che tipo di caramello volete preparare: liquido o solido?
- L’ideale è usare il saccarosio per ottenere un caramello ambrato . Altri zuccheri presentano delle gestioni differenti;
- Il tegame nel quale lavoro lo zucchero deve essere molto spesso in modo da condurre il calore in modo uniforme e alto abbastanza da poter evitare che qualche schizzo ustioni la pelle;
- Il caramello è molto, molto caldo e molto appiccicoso. Senon siete degli esperti, tenete a portata di mano una ciotola profonda con acqua e molto ghiaccio, non si sa mai;
- Non mescolare il caramello, sopratutto per il metodo a secco. Faccio roteare il tegame in modo da tenere il caramello in movimento;
- Una volta bruciato, non posso piu’ recuperare il mio caramello;
- Il caramello biondo è ideale per rivestire piccoli bignè, scorzette d’agrumi o croquembouche, oppure piccoli pezzi di frutta come chicchi d’uva, fragole, che resteranno avvolti da un involucro dorato e vetroso;
- Cuocere il caramello ad una fiamma media. Non andate di fretta, rischiate solo di bruciare il caramello senza neanche accorgevene;
- il caramello ambrato serve per rivestire stampi di creme caramel o flan, preparare il croccante, nappare creme, gelati, budini;
- il caramello bruno, leggermente più amaro, si usa in piccole quantità per profumare creme dolci e colorare salse e brodi.

Leave a comment