Cooking Tips
-
Ragù Bolognese: the original recipe and its history.
RAGU’ BOLOGNESE: Storia e ricetta originale (ITALIANO) Hello guys. Today it’s me, Pasquale, who is writing and I would like to talk about about Bolognese ragù. Widespread throughout Emilia, not only in Bologna, it is one of the best-known Italian cuisine recipes abroad, more elaborated and, unfortunately, mistreated. I’m just thinking of the unhappy pairing…
Alberto Alvisi, bolognese sauce, bovine diaphragm, cartella manzo bovino, come fare il Ragù bolognese, diaframma bovino, diaframma di manzo, easy steps for Ragù bolognese, French gauls, history of Ragù bolognese, homemade Bolognese sauce, homemade Ragù bolognese, how to make classic Ragù bolognese, Italian Ragù bolognese, original recipe classic Ragù bolognese sauce, pasta bolognese sauce, Ragù bolognese how to make it, Ragù bolognese ricetta originale, Ragù bolognese: storia, ragout, ragu, ragu alla bolognese, ragu bolognese, Romans, secrets for Ragù bolognese, spaghett bolognese recipe, storia del Ragù bolognese, tagliatelle bolognese sauce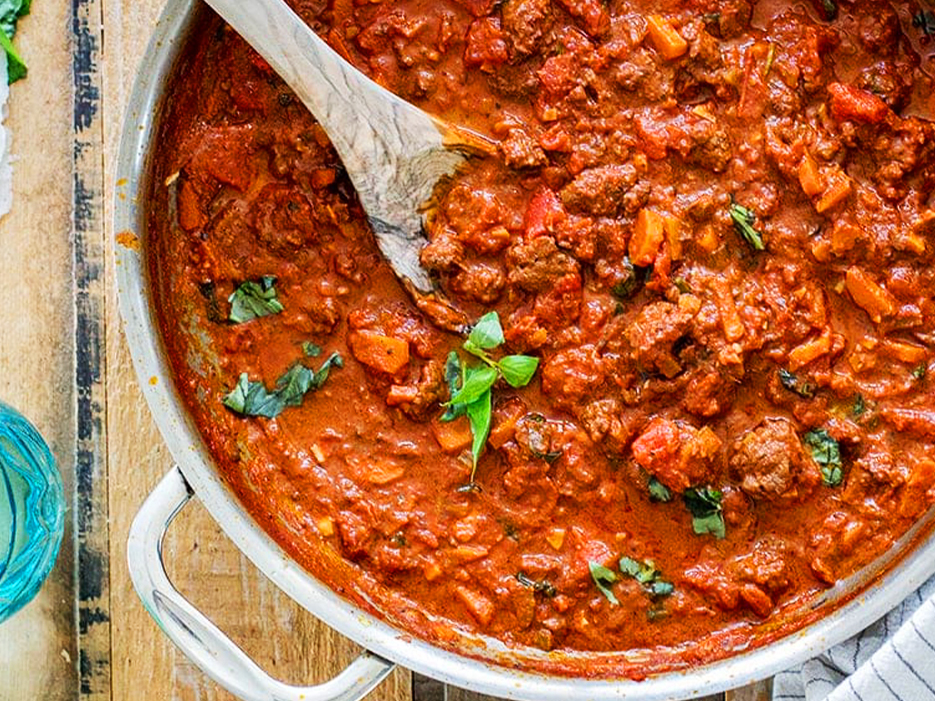
-
What is a ganache and how to make one?
COME FARE UNA GANACHE (ITALIANO) The ganache is the queen of pastry creams. It is an emulsion of solid chocolate melted in cream sometimes with butter added. An emulsion is mixture of two liquids that would not normally mix, cream and chocolate in our case. That is to say, a mixture of two immiscible liquids.…
chocolate ganache recipe, come si fa una ganache, come si realizza una ganache, easy step for a chocolate ganache, emulsion choco ganache, firmer ganache, ganache, ganache al cioccolato, ganache al cioccolato fondente, ganache al gioccolato al latte, ganache al gioccolato bianco, ganache beurre, ganache come la pasticceria, ganache secrets, how to make a chocolate ganache, how to make a ganache, How to Make Chocolate Ganache, How to Make Chocolate Ganache (Easy Recipe), how to make chocolate ganache for any dessert, milk chocolate ganache, pastry ganache, proteins and lecithin, recipe for chocolate ganache, segreti per un ganache, what is a ganache, white chocolate ganache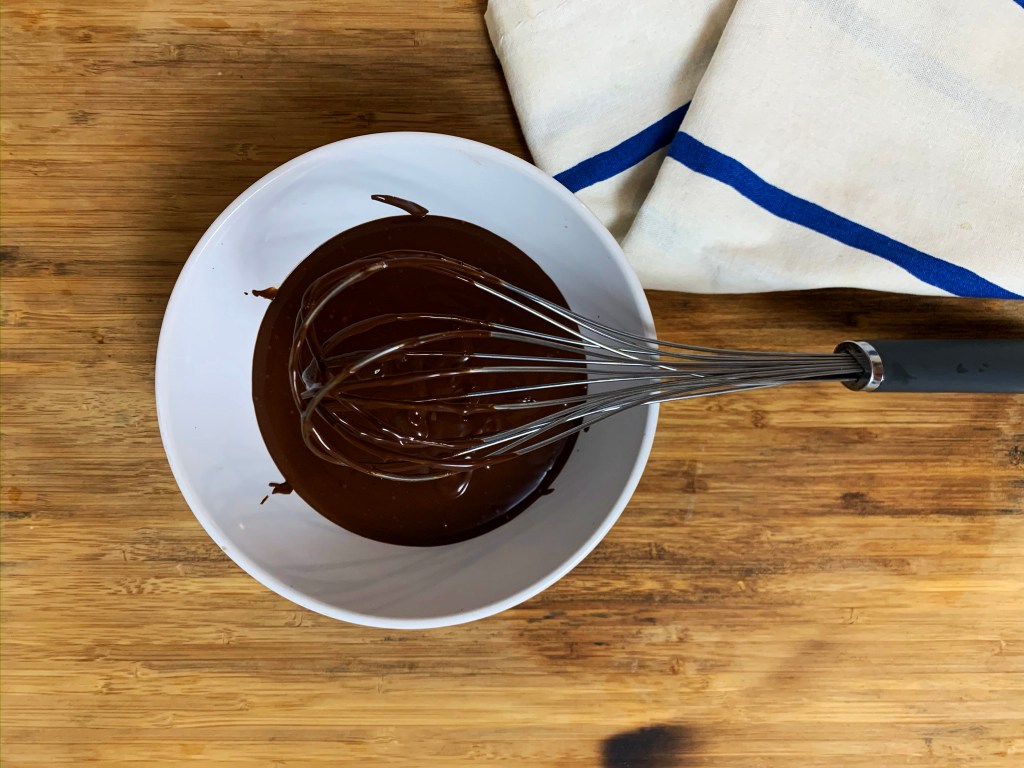
-
How to make the perfect homemade caramel
COME FARE IL CARAMELLO (ITALIANO) When we cook we are starting many chemical reactions. Probably the most fascinating is the caramelization, a sugar transformation reaction. Basically is the oxidation of sugar. The process of caramelization starts with the melting of the sugar at high temperatures (160 ° C) where the sugars starts to liquefy. Its…
best caramel recipe, caramel recipe, caramel sauce recipe, caramello al micronde, caramello bagnato, caramello cremoso, chef caramel, come fare il caramello, come fare il caramello a casa, creamy caramel, dry caramel recipe, easy caramel sauce recipe, homemade caramel, how to make caramel, how to make homemade caramel, how to make the perfect caramel, i segreti per un caramello perfetto, il caramello perfetto, microwave caramel recipe, ricetta per caramello, ricetta perfetta sul caramello, salsa al caramello ricetta, secrets for a perfect caramel, the perfect caramel, tips for a perfect caramel, wet caramel recipe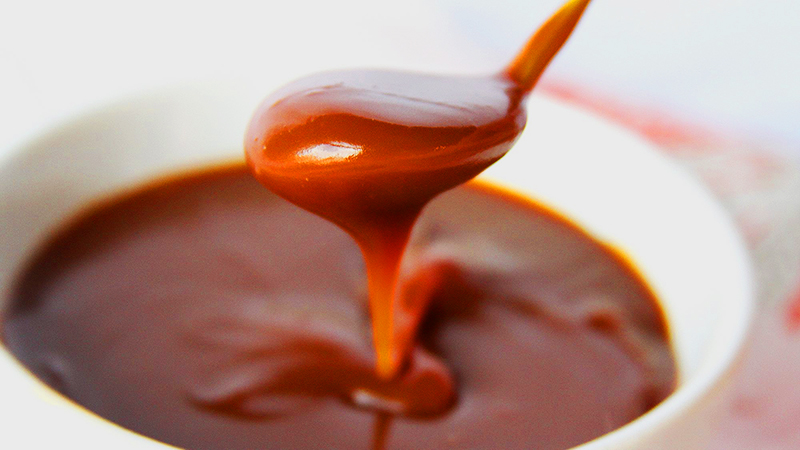
-
Simple tips for perfect homemade pasta
TRUCCHI PER PASTA FRESCA FATTA IN CASA (ITALIANO) Hello guys. In this post we’ll talk about few secrets and tips for making homemade pasta like a star. 🙂 When I make my fresh dough I always use a wood pasta board, because it makes the dough more rough; If you are using the kitchen aid…
come fare la pasta fresca a casa, fresh egg pasta, Fresh Pasta, fresh pasta like a chef, homemade pasta chefs tips, homemade pasta secrets, homemade pasta tips, how to make fresh pasta like an italian, pasta fresca, secrets for a perfect homemade pasta, Simple tips for perfect homemade pasta, tips and secrets fresh pasta, trucchi per la pasta fresca, tutti i trucchi per la psta fresca
