recipes
-
Vegan and dairy free chocolate-pumpkin cake
TORTA VEGANA AL CIOCCOLATO E ZUCCA (ITALIANO) This extra moist chocolate, pumpkin cake, topped with chocolate ganache is a perfect fall treat. It´s so easy and quick to prepar. Chocolate and pumpkin seems like an odd combination, but trust me, it really works. The ultra rich chocolate cake melds so perfectly with the warming spices…
Australia, cake for halloween, dairy free, dessert, food porn, halloween cake, Halloween treats, homemade, homemade chocolate pumpkin cake, pasticceria italiana, pastry, pumpkin cake, pumpkin cake and chocolate, pumpkin chocolate cake, recipes, the foodie lovers, torta zucca e cioccolato vegana e dairy free, vegan and dairy free choco pumpkin cake, vegan and dairy free pumpkin chocolate cake, vegan cakes, vegan pumpkin cake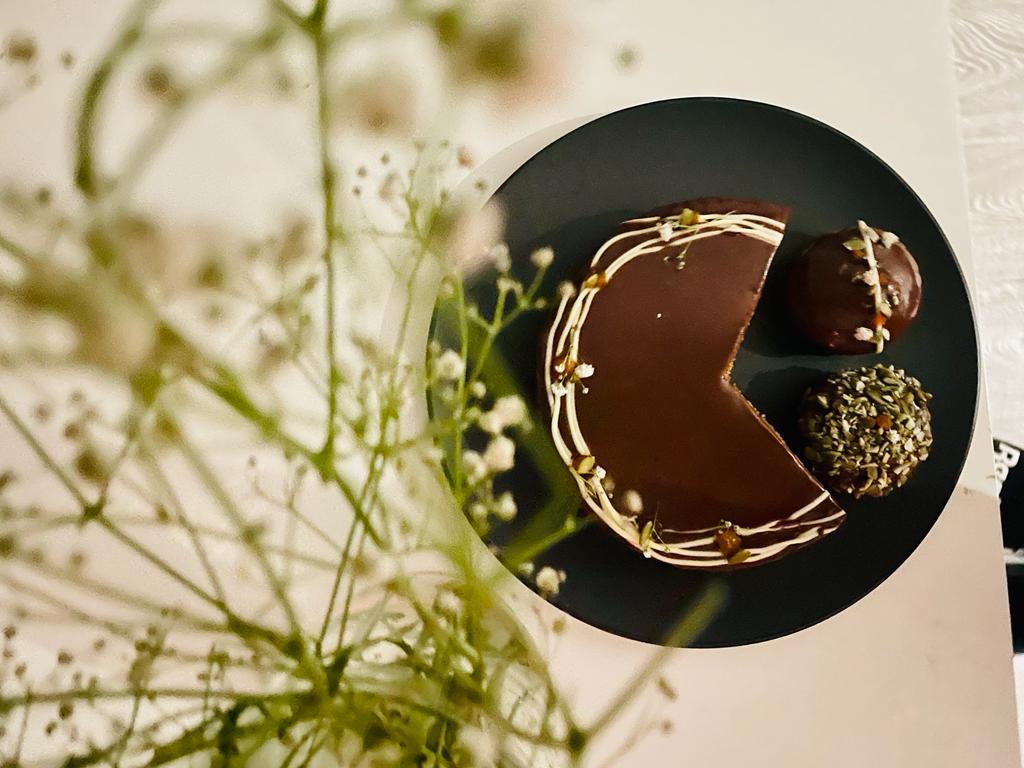
-
Eggplant Parmigiana
PARMIGIANA DI MELANZANE (ITALIANO) One of the most famous and appreciated dishes of Italian cuisine, especially out of the country is the Eggplant Parmigiana. It is a classic Italian dish made with thinly sliced, floured and fried eggplant layered with tomato sauce and cheese and baked in the oven. A lot of regions in Italy…
basilico, campania, chicen parmigiana, easy step for an eggplant parmigiana, easy step for eggplant parmigiana, eggplant, eggplant parmesan, Eggplant parmigiana, eggplant parmigiana italian recipe, eggplant parmigiana recipe, healty version, how to make a parmigiana, how to make an eggplant parmigiana, Italian recipe, Italian tradition, melanzane parmigiana ricetta originale, neapolitan cuisine, olio di oliva, olive oil, original recipe eggplant parmesan, parmesan eggplant, parmesan melanzane, parmigiana di melanzane, parmigiana di pollo, parmigiana melanzane ricetta originale, parmigiano reggiano, pomodoro passata, ricetta parmigiana di melanzane, sicilia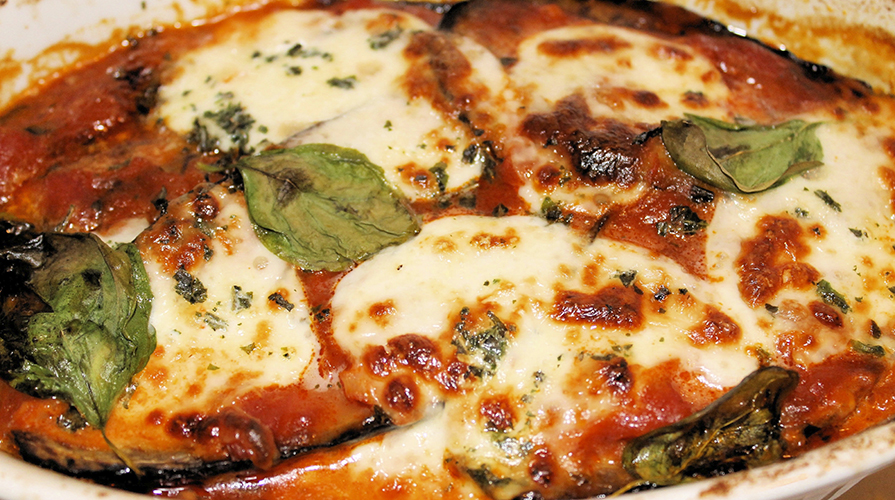
-
Classic Ragù Bolognese
RAGU’ BOLOGNESE (ITALIANO) This Classic Bolognese Sauce is made using all the authentic ingredients like beef, pork, tomato purée, then cooked low and slow for hours to develop a rich, hearty taste. I’ve already spoken about its history and the best tips for making it in this POST. The original recipe it’s been deposited to…
bologna, bolognese sauce, bovine diaphragm, Camera di Commercio di Bologna, cartella manzo bovino, classic bolognese sauce, come fare il Ragù bolognese, diaframma bovino, easy steps for Ragù bolognese, Fresh Pasta, fresh ragu, history of Ragù bolognese, homemade, homemade Bolognese sauce, homemade Ragù bolognese, homemade tagliatelle, how to make classic Ragù bolognese, Italian Ragù bolognese, original recipe classic Ragù bolognese sauce, pasta bolognese sauce, Ragù bolognese how to make it, Ragù bolognese recipe, Ragù bolognese ricetta originale, Ragù bolognese: storia, ragout, ragu, ragu alla bolognese, ragu bolognese, secrets for Ragù bolognese, spaghett bolognese recipe, storia del Ragù bolognese, tagliatelle bolognese, tagliatelle bolognese sauce, the foodie lovers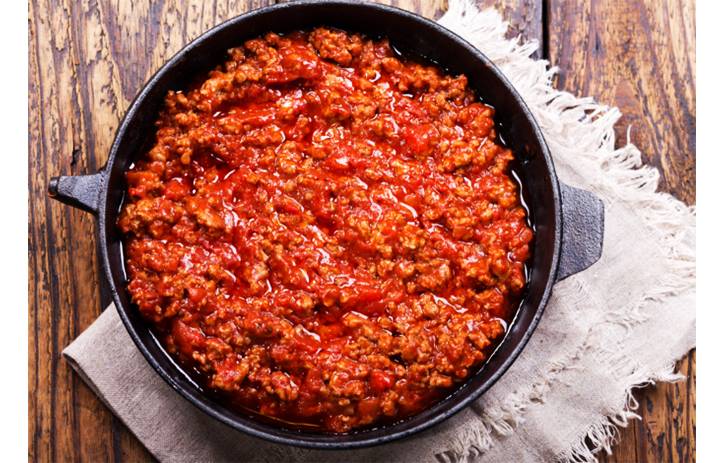
-
Pizza di scarole (escarole pie)
PIZZA DI SCAROLE (ITALIANO) It is well known in the world that Italians love food and when there is a holiday to celebrate this love grows beyond measure! One of the things that I love that my mom and my grandmother always use to prepare for lunch on 24th of December, so on Christmas’s eve,…
Australia, baked escarole pie, endive pie, escarole pie, escarole stuffed pizza, haberfield sydney, how to make escarole pie, how to make italian pie, how to make pizza, how to make pizza di scarole, how to use escarole, how to use scarole, italian pizza, italian vegetarian pizza, la scarola e la pizza, Neapolitan Classics: Pizza di Scarola, pizza con la scarola, pizza di scarola ricetta originale, pizza di scarola ricetta originale napoletana, pizza di scarole napoletana, ricetta facile per pizza di scarola, ricetta facile pizza scarola, ricetta facile scarola liscia, ricetta pizza scarola napoletana, rustic escarole pie italian recipe, rustic pie recipe, scarola liscia, scarola riccia, shortcrust pie escarole, tricks for scarole, vegetarian escarole pie, vegetarian pizza
-
Graffe Napoletane (Neapolitan Doughnuts)
GRAFFE NAPOLETANE (ITALIANO) Naples is in my opinion one of the most beautiful cities in the world: culture, entertainment, history and of course food. The summer nights, walking through the streets in Naples, at Mergellina seafront and the inevitable GRAFFA NAPOLETANAor ZEPPOLA FRITTA. Soft, fragrant and melting in the mouth, our graffe are a sin…
ciambella fritta, come fare le zeppole fritte, easy step donuts recipe, graffa fritta, graffe napoletane, Graffe Napoletane (Italian donuts), graffe napoletane con patate, how to make donuts, Italian Pizza Fritta Fried Dough, neapolitan doughnuts, neapolitan dounuts, neapolitan dughnuts, original recipe neapolitan doughnuts, original recipe zeppole fritte, ricetta graffa fritta, ricetta originale delle graffe napoletane, ricetta zeppola fritta napoletana, zeppola napoletana fritta ricetta, zeppole fritte, zeppole fritte con patate, zeppole fritte ricetta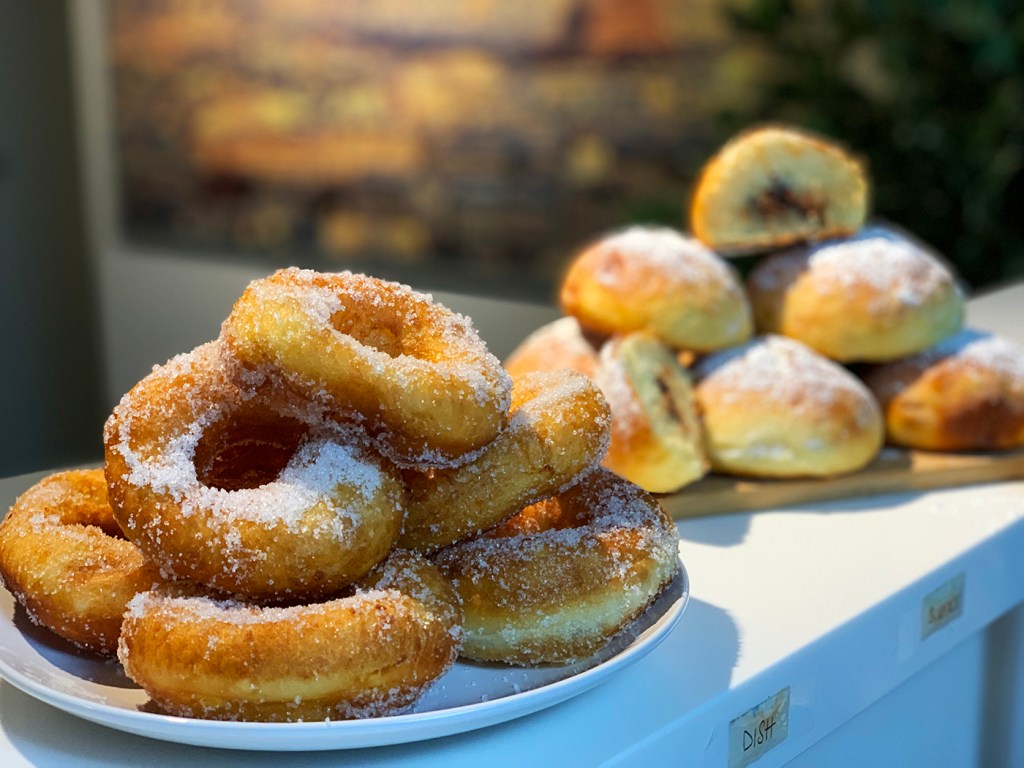
-
Profiteroles
PROFITTEROL (ITALIANO) “Happy mother’s day!“ One of my mother’s favorite desserts are the Profiteroles, very famous cream puffs filled with Chantilly cream, covered with a tasty and shiny chocolate glaze. At my home in Italy they were often the Sunday dessert and for this reason I decided to prepare them to celebrate Mother’s Day in…
best recipe for profiteroles, Bigne, chocolate sauce, choux pastry, come fare i profitteroli, dessert recipe, fillin for profiteroles, home made profiteroles, how to make profiteroles, italian profiteroles, pasta bigne con cioccolato, pasta choux, profiteroles, profitterol, profitteroli ripieni, yummy profiteroles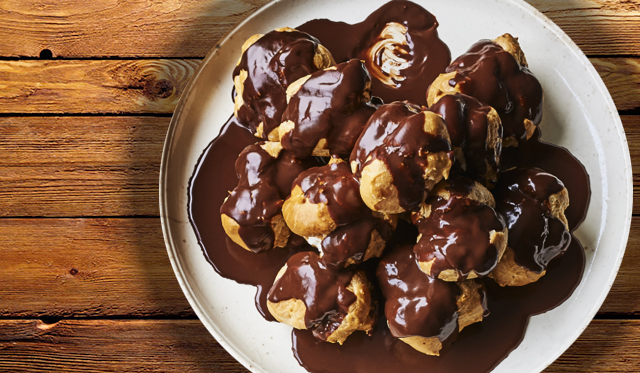
-
What is a ganache and how to make one?
COME FARE UNA GANACHE (ITALIANO) The ganache is the queen of pastry creams. It is an emulsion of solid chocolate melted in cream sometimes with butter added. An emulsion is mixture of two liquids that would not normally mix, cream and chocolate in our case. That is to say, a mixture of two immiscible liquids.…
chocolate ganache recipe, come si fa una ganache, come si realizza una ganache, easy step for a chocolate ganache, emulsion choco ganache, firmer ganache, ganache, ganache al cioccolato, ganache al cioccolato fondente, ganache al gioccolato al latte, ganache al gioccolato bianco, ganache beurre, ganache come la pasticceria, ganache secrets, how to make a chocolate ganache, how to make a ganache, How to Make Chocolate Ganache, How to Make Chocolate Ganache (Easy Recipe), how to make chocolate ganache for any dessert, milk chocolate ganache, pastry ganache, proteins and lecithin, recipe for chocolate ganache, segreti per un ganache, what is a ganache, white chocolate ganache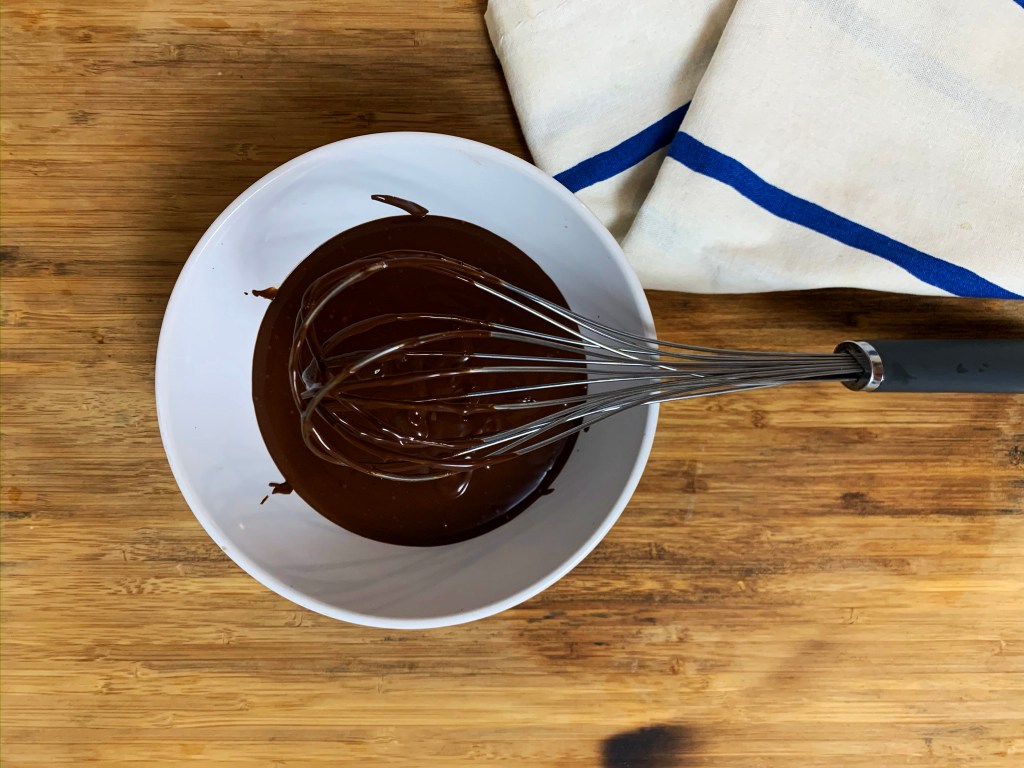
-
Peanut Butter Mousse Crunch Cake
TORTA CROCCANTE AL BURRO DI ARACHIDI E CIOCCOLATO (ITALIANO) This Saturday we’ve have been invited for dinner by our friends Mario and Fabio, two friends from Milan, Italy who have lived in Sydney since 3 years now. Pizza will be the Queen of the night but I need to think about a dessert. What should…
american cake peanut butter and chocolate, american dessert cake, australian dessert, burro di arachidi crunchy, burro di arachidi e cioccolato, choco mousse, choco peanut butter cake, choco peanut butter corn flakes, cioccolato e arachidi, corn flakes cake, custard al peanut butter, dominique ansel, mousse al burro di arachidi, mousse al cioccolato, peanut butter australian cake, peanut butter cake, peanut butter mousse, Peanut Butter Mousse Crunch Cake, Torta al burro di arachidi e cioccolato fondente, torta croccante al burro di arachidi e cioccolato, yummy cake chocolate mousse, yummy cake peanut butter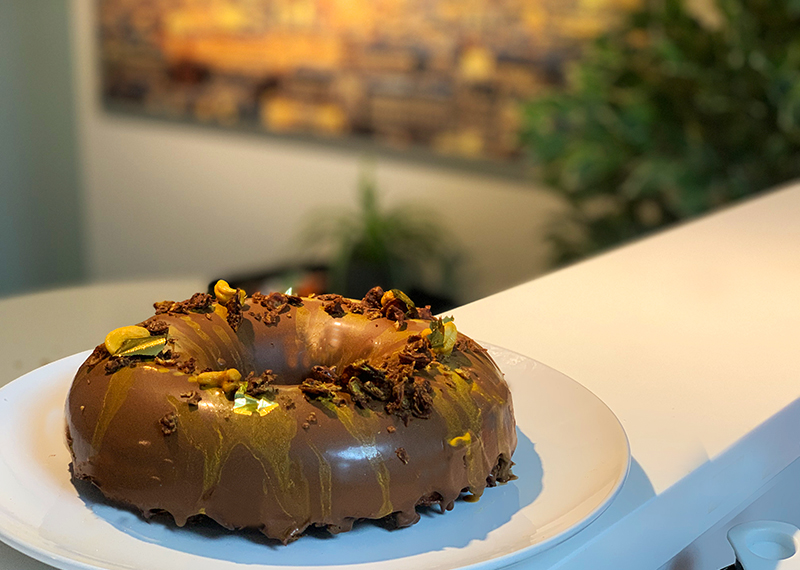
-
Traditional White Bread
PAN BAULETTO (ITALIANO) Soft and fragrant, excellent with salty or sweet toppings, the soft and fragrant white bread lends well to the preparation of toasts and sandwiches. Making it at home is really simple and in addition to having the guarantee of a fresh product, we will not be forced to smell the typical smell…
come fare il pan bauletto, come fare il pancarre, easy steps for make white bread, easy white toast, excellent white bread, how to make bread, how to make white bread, how to make white toast bread, Italian toast at home, pan bauletto morbido fatto a casa, pan bauletto ricetta originale, pan carre ricetta originale, pancarre, pane fatto in casa, pane in cassetta ricetta originale, ricetta pane fatto in casa per toast, sandwich, tips for white bread, toast, tosta pane, white bread, white bread recipe, White Bread Toast, white toast bread original recipe, white toast sliced bread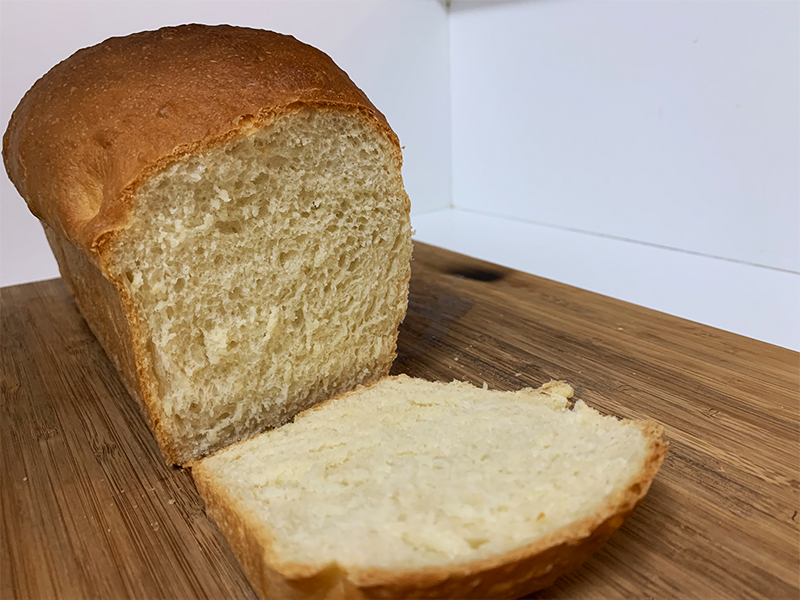
-
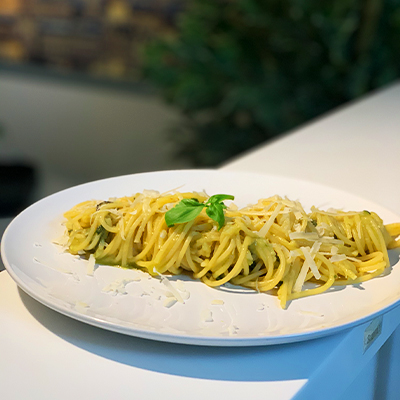
Spaghetti alla Nerano
SPAGHETTI ALLA NERANO (ITALIANO) Campania is one of the most beautiful Italian regions and one of the most loved destinations by the world jet-set, especially for Australians. The absolute jewel of the region is the Amalfi Coast, a stretch of coast located south of the Sorrento Peninsula that overlooks the Gulf of Salerno and has…
agerola, amalfi coast, cetara alici, costiera amalfitana, how to make nerano pasta, how to make spaghetti nerano, nerano, parmigiano reggiano, partenopea Cuisine, pasta nerano, pasta recipes vegetarian, pasta spaghetti de cecco, pasta zucchini, provolone del monaco, provolone recipe, secrets and recipes, sorrento, sorrento peninsula, spaghetti alla nerano, spaghetti nerano fried zucchini, spaghetti nerano history, spaghetti nerano recipe, spaghetti nerano ricetta, spaghetti nerano storia, spaghetti nerano trucchi e consigli, spaghetti nerano zucchini, unesco, vegan friendly recipe