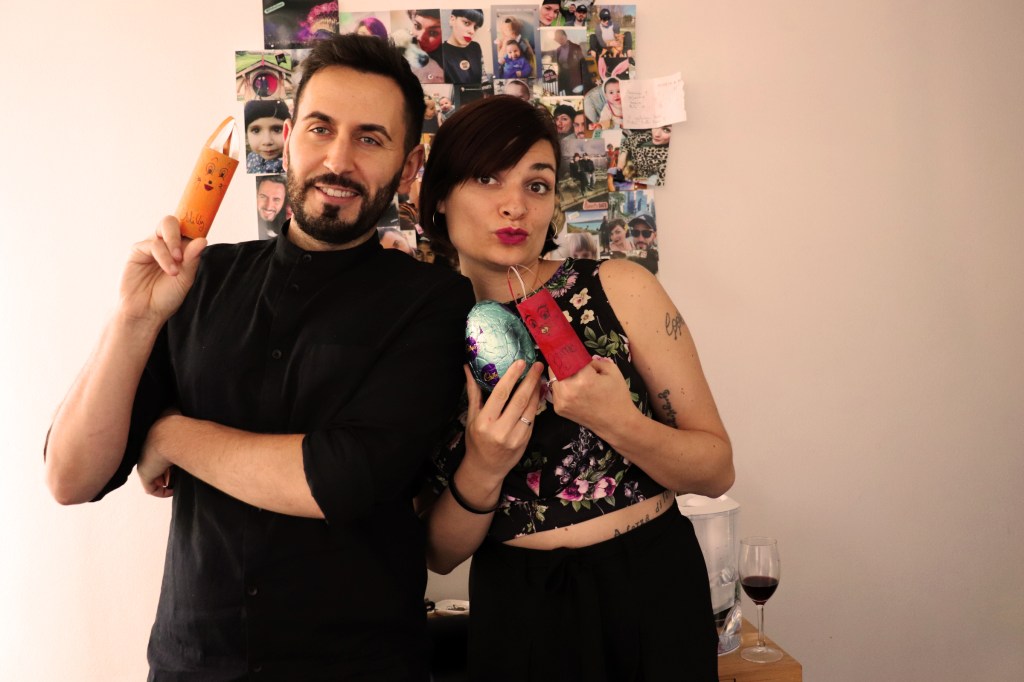
Australia
-
Vegan and dairy free chocolate-pumpkin cake
TORTA VEGANA AL CIOCCOLATO E ZUCCA (ITALIANO) This extra moist chocolate, pumpkin cake, topped with chocolate ganache is a perfect fall treat. It´s so easy and quick to prepar. Chocolate and pumpkin seems like an odd combination, but trust me, it really works. The ultra rich chocolate cake melds so perfectly with the warming spices…
Australia, cake for halloween, dairy free, dessert, food porn, halloween cake, Halloween treats, homemade, homemade chocolate pumpkin cake, pasticceria italiana, pastry, pumpkin cake, pumpkin cake and chocolate, pumpkin chocolate cake, recipes, the foodie lovers, torta zucca e cioccolato vegana e dairy free, vegan and dairy free choco pumpkin cake, vegan and dairy free pumpkin chocolate cake, vegan cakes, vegan pumpkin cake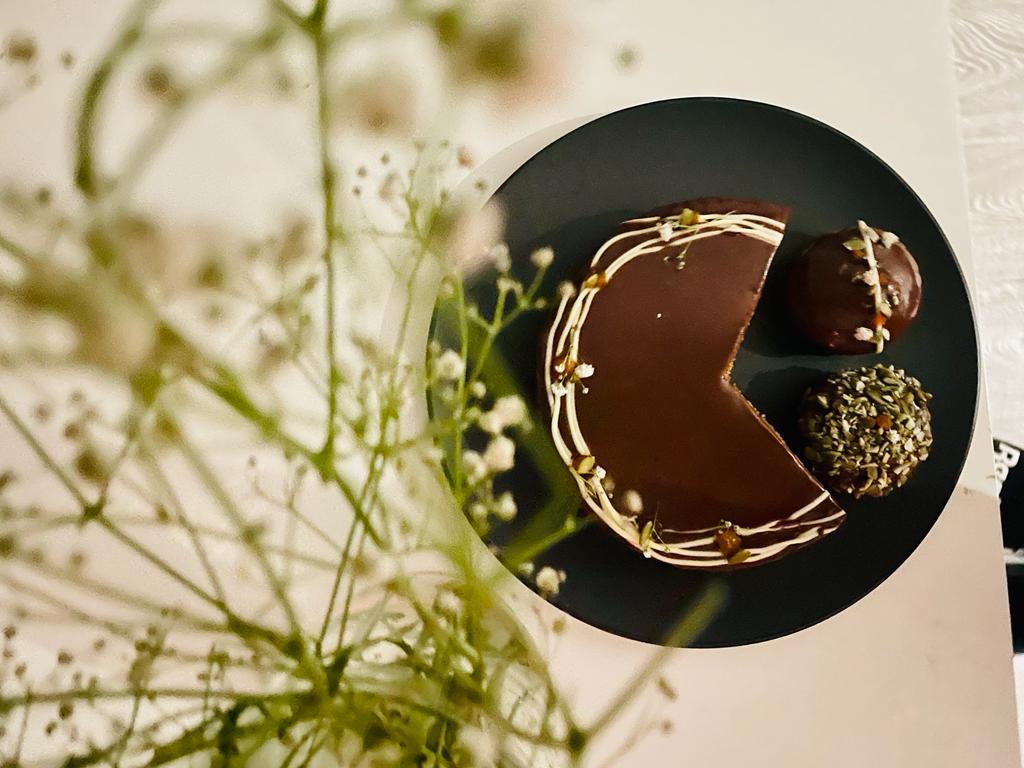
-
What’s the difference between all the types of salt? (Part I)
QUAL’E’ LA DIFFERENZA TRA I VARI TIPI DI SALE? (parte 1) Everyday when we go shopping at the supermarket we find various types of salt, and everyone of them got a different health properties. Many of us don’t even notice it, others think it’s just a marketing factor, many people don’t even care .. But…
Atlantic Grey Salt, Atlantico, Australia, Black Lava Sale Hawaii, Black Lava salt, differences between salt, Fior di sale, Fior di Sale Delta dell'Ebro, Fleur de Sel de Camargue, Francia, Hawaiian green salt, Himalayan Pink Salt, italy, Kalahari Salt, Murray RIver Pink Salt, Pacific, Persian Blue Salt, sale, Sale Blu di Persia, Sale del deserto Kalahari, Sale grigio dell'Atlantico, Sale rosa del Murray River Australia, Sale Rosa dell'Himalaya, salt, tutti i tipi di sale, vari tipi di sale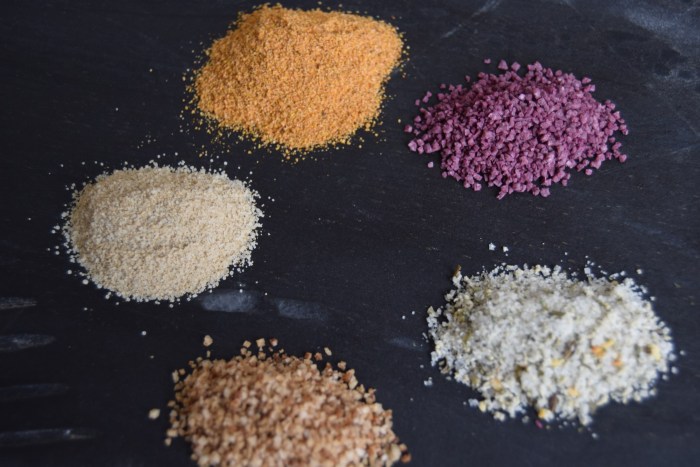
-
Pizza di scarole (escarole pie)
PIZZA DI SCAROLE (ITALIANO) It is well known in the world that Italians love food and when there is a holiday to celebrate this love grows beyond measure! One of the things that I love that my mom and my grandmother always use to prepare for lunch on 24th of December, so on Christmas’s eve,…
Australia, baked escarole pie, endive pie, escarole pie, escarole stuffed pizza, haberfield sydney, how to make escarole pie, how to make italian pie, how to make pizza, how to make pizza di scarole, how to use escarole, how to use scarole, italian pizza, italian vegetarian pizza, la scarola e la pizza, Neapolitan Classics: Pizza di Scarola, pizza con la scarola, pizza di scarola ricetta originale, pizza di scarola ricetta originale napoletana, pizza di scarole napoletana, ricetta facile per pizza di scarola, ricetta facile pizza scarola, ricetta facile scarola liscia, ricetta pizza scarola napoletana, rustic escarole pie italian recipe, rustic pie recipe, scarola liscia, scarola riccia, shortcrust pie escarole, tricks for scarole, vegetarian escarole pie, vegetarian pizza
-
Pavlova
PAVLOVA (ITALIANO) There are plenty of tasty and fulfilling recipes you can bake. Also, there are many desserts which we don’t know the origin. Let’s talk about Pavlova. It has been a long standing battle between Australia and New Zealand as to who invented the pavlova. “The Oxford English Dictionary may have settled a long-running…
amore, anna pavlova, anzac day, Australia, ballerina, banana, banana and pavlova, banoffee pavlova, banoffee pie, cantilly cream, chef, come fare la pavlova, Davis Dainty Dishes, dessert, easy pavlova, fluffy pavlova, Hotel Des Indes, how to make meringue, how to make pavlova, how to make perfect pavlova, il dessert della nuova zelanda, kiwi, meringa, meringue, meringue-based dessert, most iconic dessert in australia, most iconic dessert in new zealand, new world, new zealand, nuova zelanda dessert, Oxford English dictionary, pablova banoffee cream, pavlova, pavlova and chantilly, pavlova cake, pavlova is kiwi, pavlova origin, Pavlova recipe, pavlova with fresh fruits, Russian ballerina Anna Pavlova, Se non posso danzare allora preferisco morire, secrets for a perfect pavlova, Swan Lake, sweet dessert, The Hague, wellington, white vinegar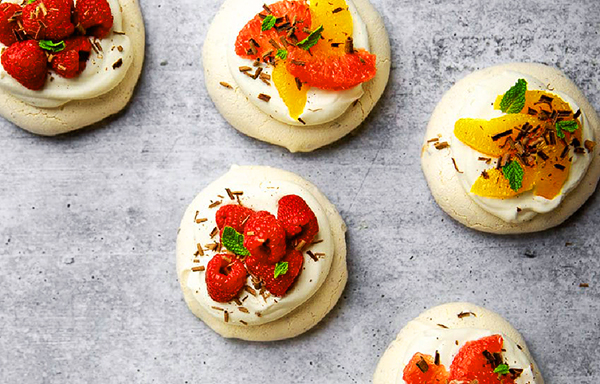
-
Green Tea Biscotti
BISCOTTI DA TE’ (ITALIANO) Who doesn’t love tea and crunchy bikkies? In several posts I spoke about vary kind of pastry and their different structures based on use. When I want sweet and mouth-watering pastries, I choose the FROLLA MONTATA. It si so crunchy because of the high percentage of butter contained and it is…
afternoon, afternoon tea, Australia, bikkies, biscotti, biscotti and teas, biscottini, biscuit and chocolate, biscuits, biscuits recipes, chocolate drizzle, cookies, Desserts, food porn, green tea biscotti, italy, pasticcini, pastry chef, patisserie, recipes, snack, sweets, tea, tea biscuit, tea time, Tea-Scented Breakfast Biscotti, tentazioni
-
Tiramisu’
TIRAMISU (ITALIANO) Oh yeah! We decided to make our great timeless classic: Tiramisu’, the most famous Italian dessert in the world. Of course, as with any iconic dessert, there are a number of variations of the classic recipe. Some people like to sprinkle biscotti (biscuits) throughout the layers to add a bit of crunch; others…
Australia, Best Tiramisu, cacao, Classic tiramisu, cocoa, coffee, cream, crema pasticciera, custard, dessert, Desserts, dolci che passione, easy step for tiramisu, easy tiramisu, famous tiramisu, food porn, homemade tiramisu, how to make mascarpone, how to make tiramisu, Irresistible Tiramisu with Lots of Tips, italian dessert, italian tiramisu, italy, Kahlúa, Lady FInger, Marsala, mascarpone, meringa italiana, pastry chef, pate a bombe, recipes, Savoiardi, Savoiardi Biscuits, sponge cake tiramisu, sponge fingers, step by step tiramisu, sweet moments, the foodie lovers, Tiramisu, Tiramisu al bicchiere, Tiramisu Authentic Italian Recipe, Tiramisu da fare a casa, Treviso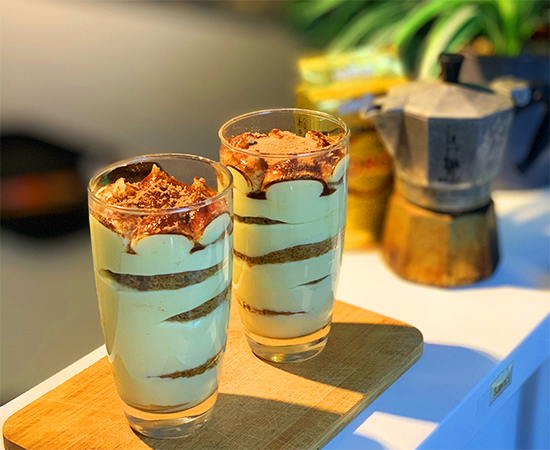
-
Pastiera Napoletana
LA PASTIERA NAPOLETANA (ITALIANO) I must recognize that the start of 2020 is a clear continuation of the negativity of 2019 but is going fast. We are already at Easter… This unusual Easter which has deprived us of love and people. Let me say that Pasquale and I are not Catholics but we like to…
ancient naples, ancient recipes, Australia, cannella, center of Naples, centro storico di Napoli, chefslife, chefstalk, citrus, crema pasticcera, crema pasticciera, custard, decumani, dessert, dolce pasquale, easter, eggs, food blogger, food porn, grano cotto, happy easter, italian, Italian tradition, lard, legend, lemon, manicaretto, naples, Napoli, neapolis, neapolitan, neapolitan pastiera, orange blossom, oranges, Partenope, partenope siren, Pasqua, pasta frolla, pastiera, pastiera napoletana, pastry, patisserie, patissier, quadrati, quartiere italiano, recipes, ricotta di pecora, San Gregorio Armeno, seven strips, siren, strisce, strutto, sydney, the foodie, thefoodieblog, thefoodielovers, tradizioni, tradizioni italiane, wheat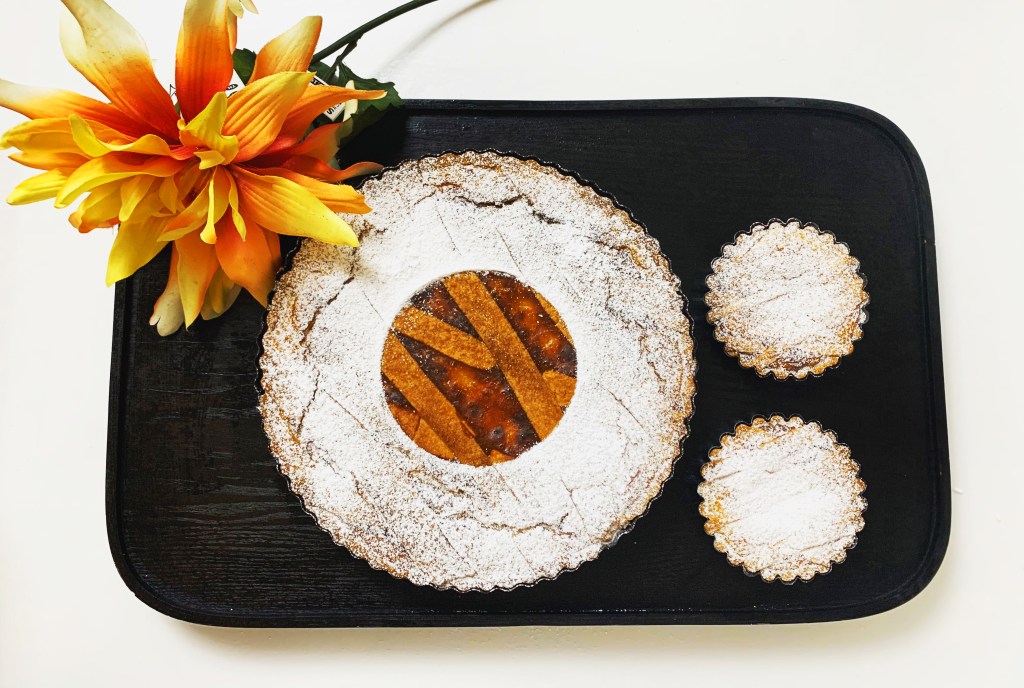
-
The Journey BEGINS
IL VIAGGIO COMINCIA (ITALIANO) Start writing a blog … mmh I’ve never been good whit technology. Of course I always have Instagram and Facebook under control: nowadays it seems like everyone has an addiction to likes and hearts! Beyond this, however, using the PC also bores me to be honest … being seated in the…