patisserie
-
Green Tea Biscotti
BISCOTTI DA TE’ (ITALIANO) Who doesn’t love tea and crunchy bikkies? In several posts I spoke about vary kind of pastry and their different structures based on use. When I want sweet and mouth-watering pastries, I choose the FROLLA MONTATA. It si so crunchy because of the high percentage of butter contained and it is…
afternoon, afternoon tea, Australia, bikkies, biscotti, biscotti and teas, biscottini, biscuit and chocolate, biscuits, biscuits recipes, chocolate drizzle, cookies, Desserts, food porn, green tea biscotti, italy, pasticcini, pastry chef, patisserie, recipes, snack, sweets, tea, tea biscuit, tea time, Tea-Scented Breakfast Biscotti, tentazioni
-
Pastiera Napoletana
LA PASTIERA NAPOLETANA (ITALIANO) I must recognize that the start of 2020 is a clear continuation of the negativity of 2019 but is going fast. We are already at Easter… This unusual Easter which has deprived us of love and people. Let me say that Pasquale and I are not Catholics but we like to…
ancient naples, ancient recipes, Australia, cannella, center of Naples, centro storico di Napoli, chefslife, chefstalk, citrus, crema pasticcera, crema pasticciera, custard, decumani, dessert, dolce pasquale, easter, eggs, food blogger, food porn, grano cotto, happy easter, italian, Italian tradition, lard, legend, lemon, manicaretto, naples, Napoli, neapolis, neapolitan, neapolitan pastiera, orange blossom, oranges, Partenope, partenope siren, Pasqua, pasta frolla, pastiera, pastiera napoletana, pastry, patisserie, patissier, quadrati, quartiere italiano, recipes, ricotta di pecora, San Gregorio Armeno, seven strips, siren, strisce, strutto, sydney, the foodie, thefoodieblog, thefoodielovers, tradizioni, tradizioni italiane, wheat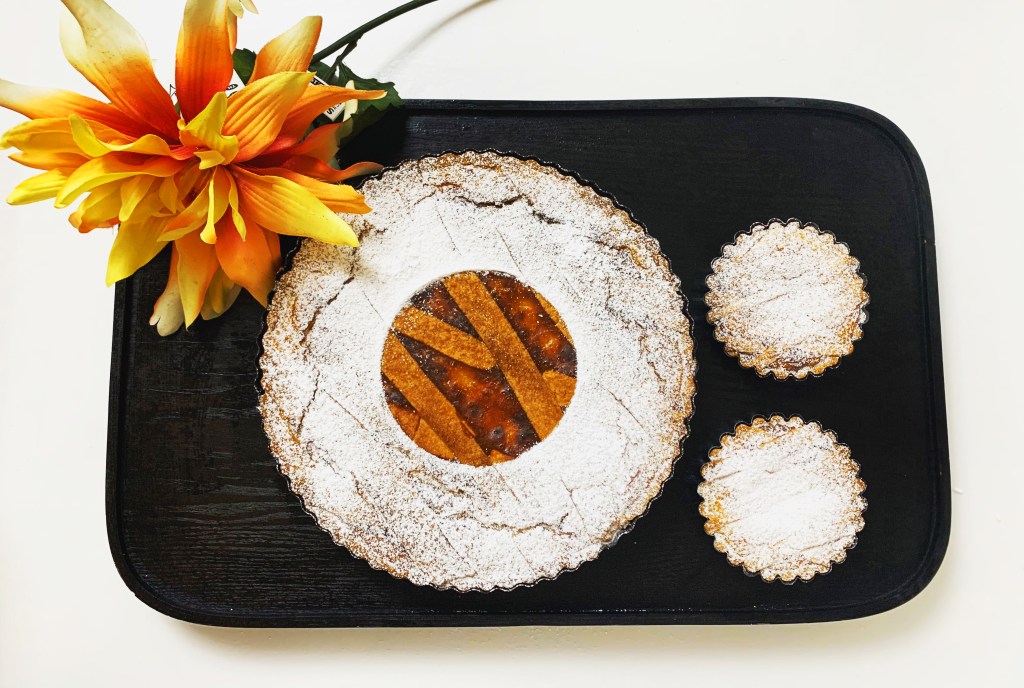
-
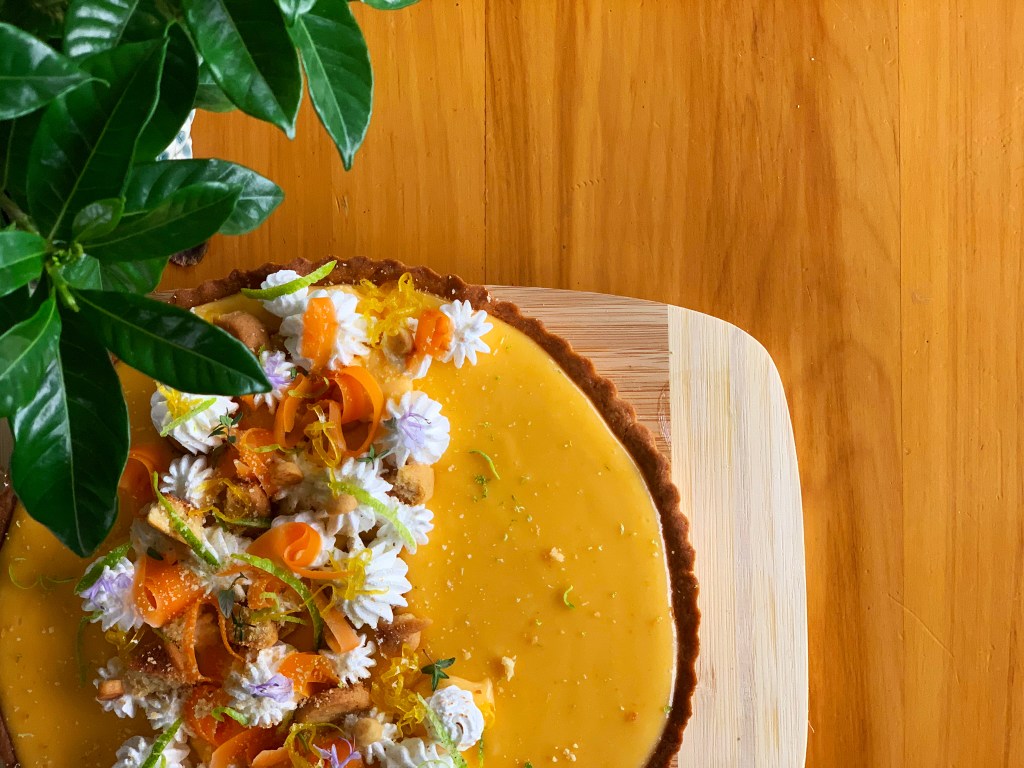
Lemon Meringue Tart
TARTE MERINGATA AL LIMONE (ITALIANO) Being in full swing of citrus season it only makes sense to make one of my favourite tarts ever: the lemon meringue tart. I love citrus fruits because contain vitamin C, reinforce the immune system and are a panacea for the mood. Energizing and refreshing the juicy blood oranges, mandarins,…
121 degrees, amalfi, Anglaise, cannello, crema Inglese, cremoso al limone, crostata, crostata ai limoni di Amalfi, crostata al limone, crostata alla frutta, Desserts, flambe merengue, frolla, frolla friabile, frolla italiana, frolla Milano, frolla montata, frolla morbida, Italian merengue, lemon cremoux, lemon meringue tart, lemon tart, made in Italy, marisa, merengue, meringa, meringa flambata, meringa italiana, meringhe, Milano, organic, pastries, pastry, patisserie, sac a poche, tarte italiana, torch, torta al limone, torta flambata, Vitamin C, zucchero