meringa
-
Pavlova
PAVLOVA (ITALIANO) There are plenty of tasty and fulfilling recipes you can bake. Also, there are many desserts which we don’t know the origin. Let’s talk about Pavlova. It has been a long standing battle between Australia and New Zealand as to who invented the pavlova. “The Oxford English Dictionary may have settled a long-running…
amore, anna pavlova, anzac day, Australia, ballerina, banana, banana and pavlova, banoffee pavlova, banoffee pie, cantilly cream, chef, come fare la pavlova, Davis Dainty Dishes, dessert, easy pavlova, fluffy pavlova, Hotel Des Indes, how to make meringue, how to make pavlova, how to make perfect pavlova, il dessert della nuova zelanda, kiwi, meringa, meringue, meringue-based dessert, most iconic dessert in australia, most iconic dessert in new zealand, new world, new zealand, nuova zelanda dessert, Oxford English dictionary, pablova banoffee cream, pavlova, pavlova and chantilly, pavlova cake, pavlova is kiwi, pavlova origin, Pavlova recipe, pavlova with fresh fruits, Russian ballerina Anna Pavlova, Se non posso danzare allora preferisco morire, secrets for a perfect pavlova, Swan Lake, sweet dessert, The Hague, wellington, white vinegar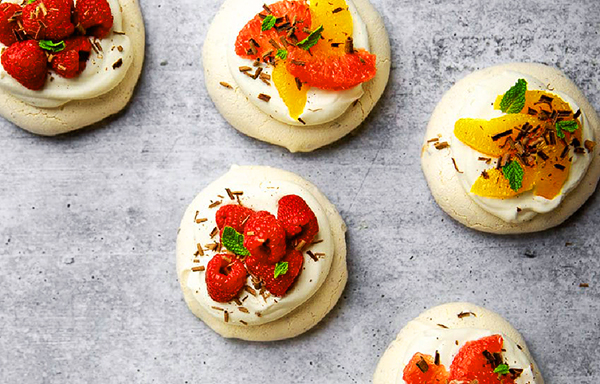
-
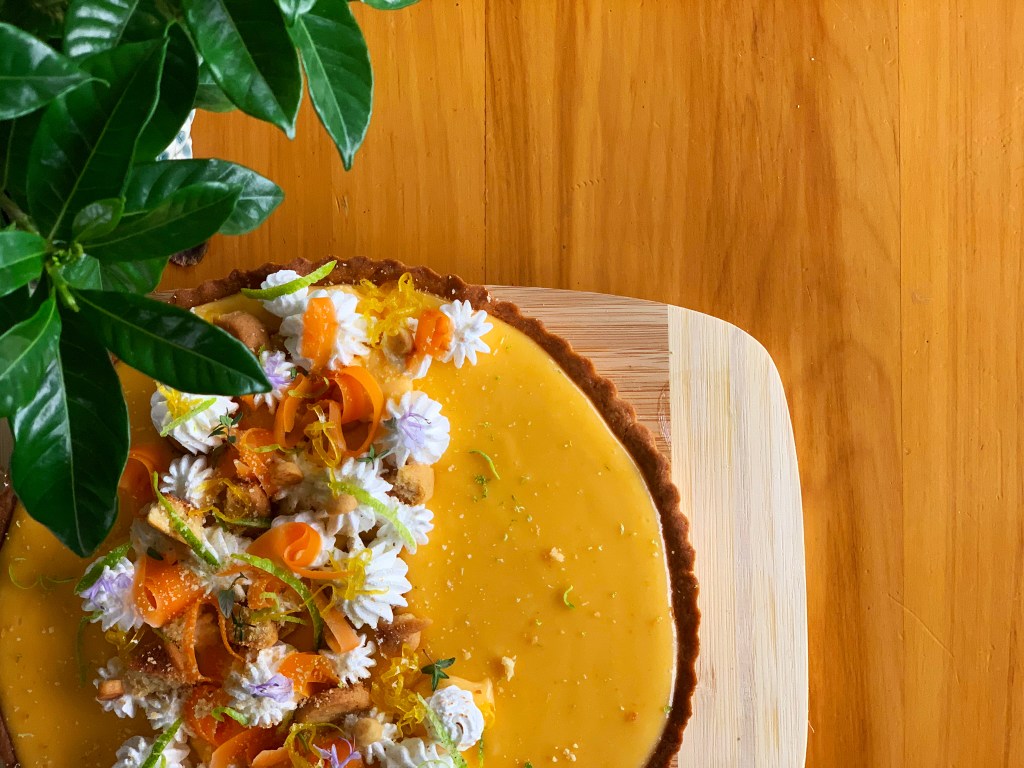
Lemon Meringue Tart
TARTE MERINGATA AL LIMONE (ITALIANO) Being in full swing of citrus season it only makes sense to make one of my favourite tarts ever: the lemon meringue tart. I love citrus fruits because contain vitamin C, reinforce the immune system and are a panacea for the mood. Energizing and refreshing the juicy blood oranges, mandarins,…
121 degrees, amalfi, Anglaise, cannello, crema Inglese, cremoso al limone, crostata, crostata ai limoni di Amalfi, crostata al limone, crostata alla frutta, Desserts, flambe merengue, frolla, frolla friabile, frolla italiana, frolla Milano, frolla montata, frolla morbida, Italian merengue, lemon cremoux, lemon meringue tart, lemon tart, made in Italy, marisa, merengue, meringa, meringa flambata, meringa italiana, meringhe, Milano, organic, pastries, pastry, patisserie, sac a poche, tarte italiana, torch, torta al limone, torta flambata, Vitamin C, zucchero