pasticceria italiana
-
Vegan and dairy free chocolate-pumpkin cake
TORTA VEGANA AL CIOCCOLATO E ZUCCA (ITALIANO) This extra moist chocolate, pumpkin cake, topped with chocolate ganache is a perfect fall treat. It´s so easy and quick to prepar. Chocolate and pumpkin seems like an odd combination, but trust me, it really works. The ultra rich chocolate cake melds so perfectly with the warming spices…
Australia, cake for halloween, dairy free, dessert, food porn, halloween cake, Halloween treats, homemade, homemade chocolate pumpkin cake, pasticceria italiana, pastry, pumpkin cake, pumpkin cake and chocolate, pumpkin chocolate cake, recipes, the foodie lovers, torta zucca e cioccolato vegana e dairy free, vegan and dairy free choco pumpkin cake, vegan and dairy free pumpkin chocolate cake, vegan cakes, vegan pumpkin cake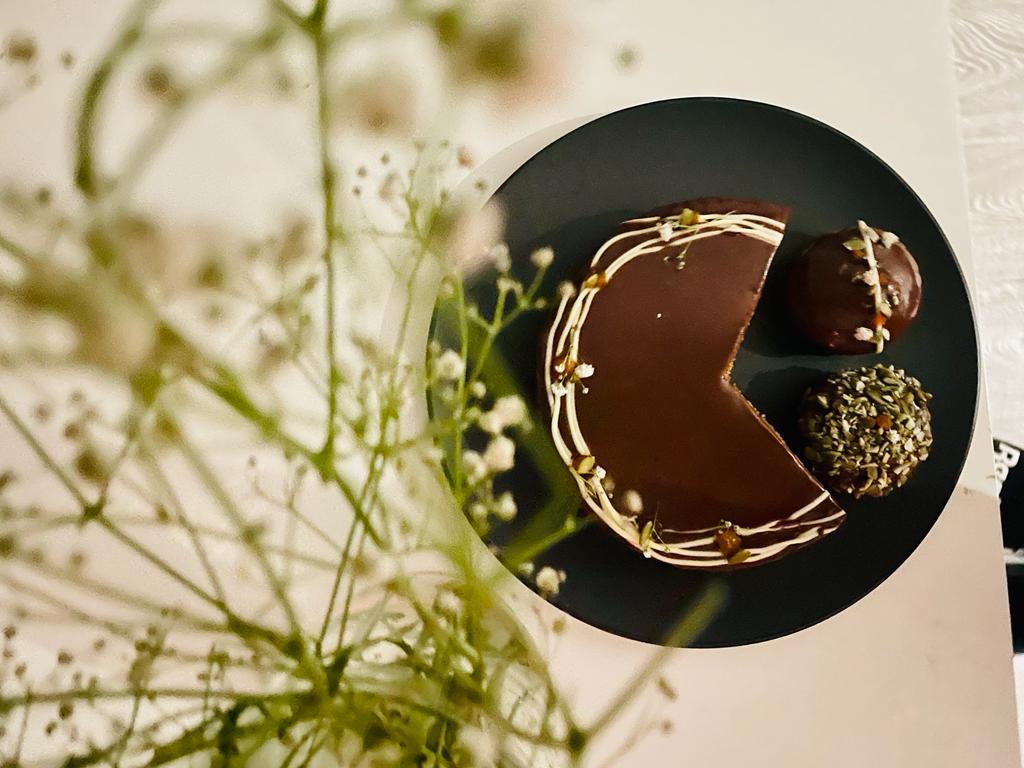
-
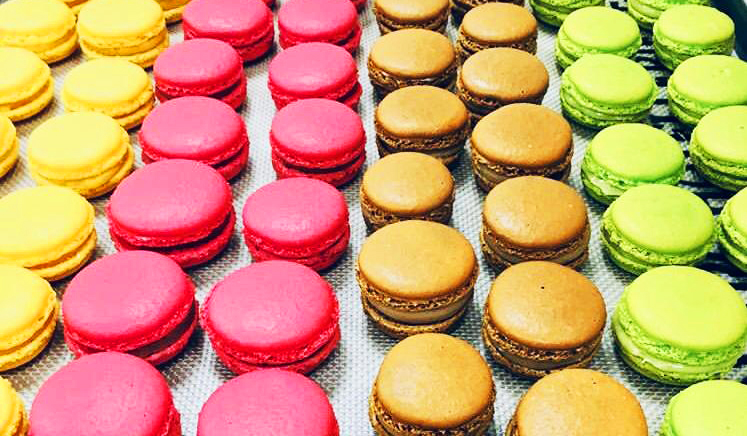
Macaron
COME FARE I MACARON (ITALIANO) Macaron, Macaron, Macaron! The macaron are delicate cookies with a crunchy exterior and weightless interior. Colorful, can be filled with anything from frosting and salted caramel to lemon curd and chocolate ganache. They have conquered everyone’s heart becoming the spearhead of every pastry shop. The version we know today was…
121 gradi, almond flavor, An Easy Macaron Recipe, An Easy Macaron Recipe for Perfect Ones Every Time, colorful macaron, easy macaron recipe, elegance, food coloring, food porn, french macaron recipe, french meringue, french method, french patisserie, gluten free macaron, gusci e coroncina, homemade macaron, How To Make Macarons Recipe by Tasty, italian meringue, italian method, italian patisserie, macaron, macaron cookies, meringa francese, meringa italiana, meringa svizzera, pasticceria, pasticceria italiana, Pierre Desfontaines, suiss meringue, suiss method, sweet treats, tasty macarons, veronese amaretti