impasto
-
Brioche
BRIOCHE (ITALIANO) Breakfast is often described as the most important meal of the day, providing as it does sustenance and energy for whatever activities lay ahead. A soy cappuccino and some biscuits are all the food I can eat as soon as I wake up. In Italy I usually have cappuccino with a nice brioche.…
authentic recipes brioche bun bread, Bakery, bakery bread, breakfast, brioche, brioche authentic, brioche bread, brioche bun, brioches, brush, burro, caolzione italiana, chefs life, colazione, continental breakfast, custard, dough, fairna, food blogger, foodporn, french, homemade, icing sugar, impasto, leavening, lievitati, nutella, pane, pastry chef, recipes, ricette autentiche, sweet tentations, the foodie lovers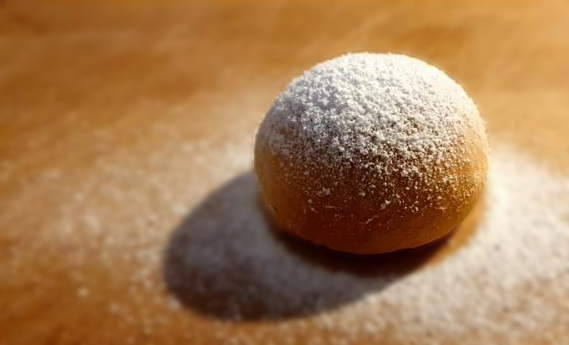
-
Homemade Tagliatelle
TAGLIATELLE FATTE IN CASA (ITALIANO) There is nothing better than homemade pasta and making a perfect fresh pasta dough is quite simple: just flour, eggs, a little bit of patience, and a good rolling pin. When making homemade pasta, you start with one recipe and you can make any shape pasta you choose, from this…
al dente pasta, blogonese, bologna, chefslife, cooking time, egg pasta, farina, fettuccine, foodporn, fresh eggs, Fresh Pasta, gluten, glutine, homemade, impasto, italian food, italian pasta, macchian per la pasta, mix, nonna papera, olio di oliva, olive oil, organic eggs, panetto, pasta dough, pasta fresca, pasta machine, pasta skills, ragu, ragu bolognese, roma, romagna, sud Italia, tagliatelle
